27 July 2023
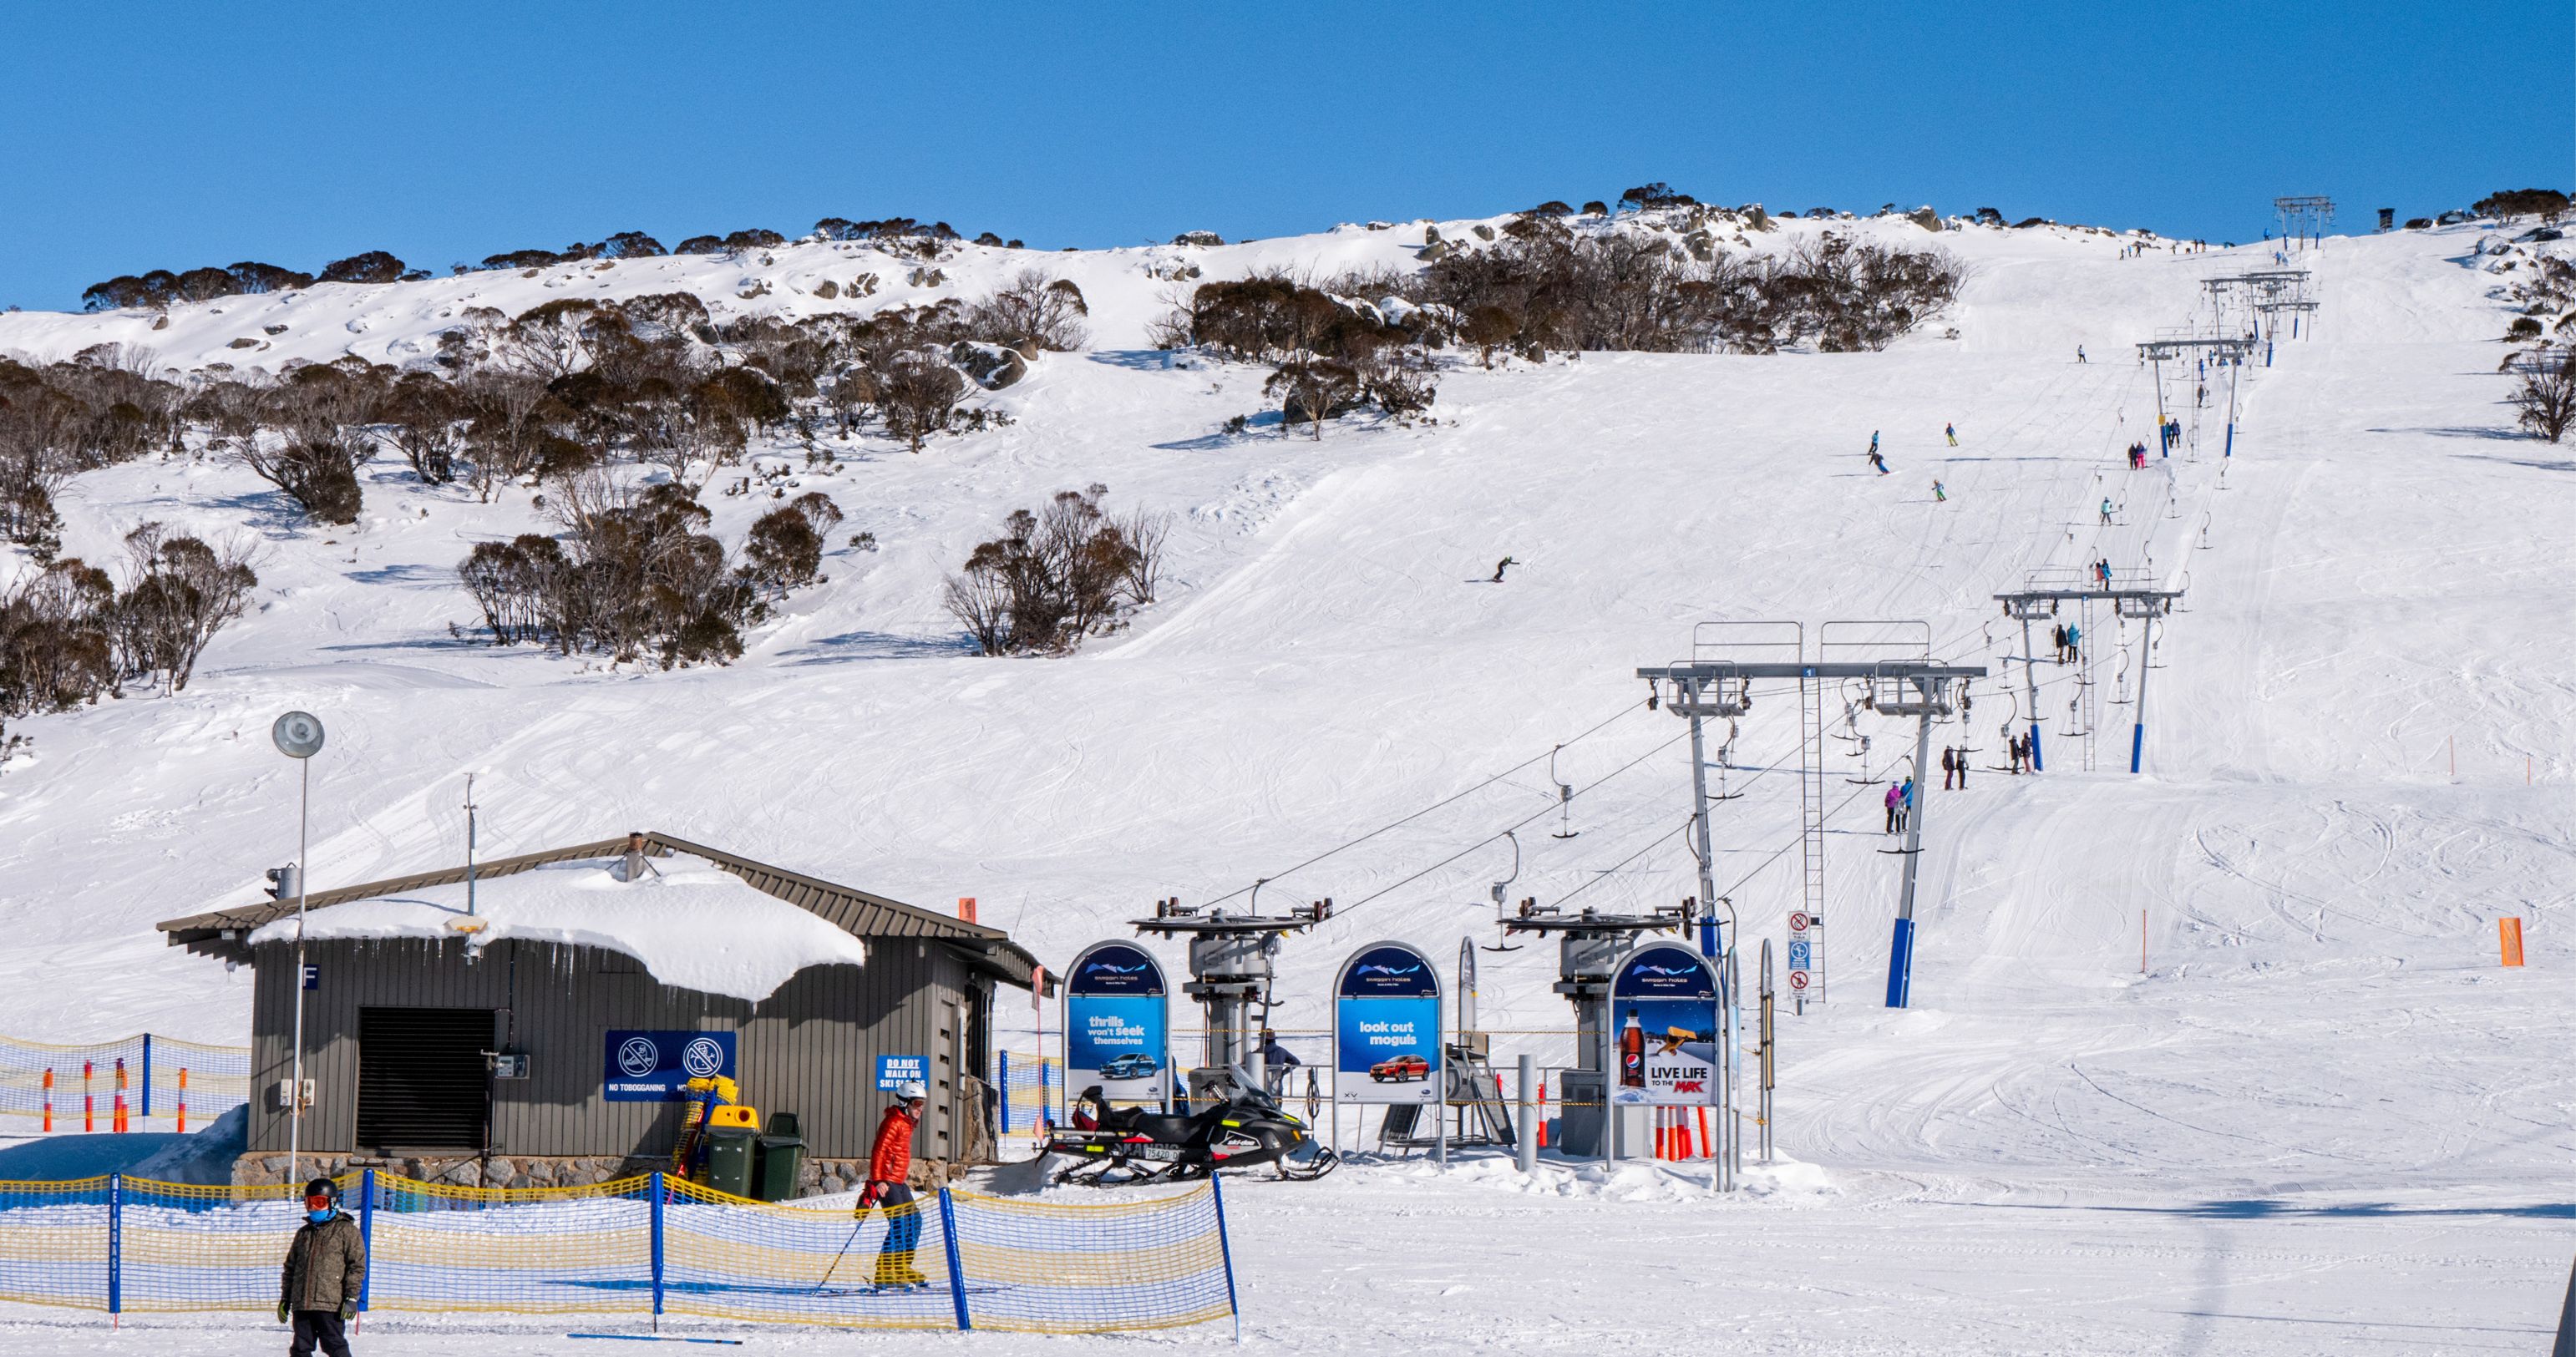
Riding T-Bars means double the amount of time on the snow!
If you are headed to Perisher this winter and have no idea how to ride a T-Bar, not to worry, because you are about to become a professional T-Bar rider! Perisher has the largest fleet of T-Bars in the Southern Hemisphere, which means you can navigate yourself around the resort solely on T-Bars! On extra windy days, you can still ski and board around Perisher whilst chairlifts are on wind hold, a luxury most Australian ski resorts don’t have!
So, if you were planning on dodging the humble T-Bar on your Perisher trip, we have some news for you. Whilst some make it look effortless, we all have the memory of catching our first T-Bar embedded in our minds. And to be frank – it's not pretty. If you get past step one, The Approach, then it’s the constant worrying thought of “am I going to make it to the top”. “Will there be a viral video of me on the internet being dragged by a T-Bar."
Of course, these are extreme cases, and this will not be you, as you are about to read The Ultimate Guide to Successfully Ride a T-Bar. Or, check out the video below!
Step 1: Scope – Read the crowd
Now, if you are riding with a friend who is around the same height as you, then you can skip this step as you have already found your T-Bar buddy.
- Hot Tip: It’s a balancing act - Riding a T-Bar with a buddy is a whole world easier than going at it alone, due to weight distribution!
If you are alone, it is time to scope the line. Keep your eye out for other single riders who need a T-Bar buddy. Once you have locked eyes on someone nearby who you think would be a suitable T-Bar buddy, simply ask them “Hey there, would you mind sharing a T-Bar with me” 9 out of 10 times this will do the trick, if not, don’t be dismayed, just ask someone else! There are plenty of fish in the sea.
- Hot Tip: Opposites attract! If you are snowboarding, it is easier to ride with someone who has an opposite stance to you.
Once you have buddied up, feel free to let your partner know it's your first time, and you may need a bit of guidance. It is also a good idea to let the lift operator know too, so they can allow extra time to get you set up.
Step 2: Positioning – Setting yourself up for success
Figure out which side of the T-Bar you want to be on. If you are snowboarding, your dominate leg needs to face up the mountain. If you are skiing, it doesn’t really matter what side you choose. Communicate this to your T-Bar buddy so you can both prepare in advance before alighting. Once you have decided what side of the T-Bar you are going to ride, make sure the person who is on the furthest side from the line positions themselves first. This will streamline the process and means you won't ride past them to assume your position.
- Hot Tip: Walk the plank - Ensure the back of your board or skis are touching the wooden plank behind you, so you and your buddy are in line for take-off!
Step 3: Alight the T-Bar – Strap in and feel the Gs
As the lift operator is aware this is your first time riding a T-Bar, they will speak to you and let you know what is going to happen. This process is quite different for boarders and skiers, so let's walk through the different combinations.
Yin and Yang – Snowboard + snowboard combo:
As we said, opposites attract, make sure you and your T-Bar buddy are facing each other. If not, that is okay, ensure the beginner rider is on the side that faces the inside of the T-Bar. The T-Bar will then be placed between the middle of you both, so watch your head and leave enough room for the lift operator to do this. Have a look back so you can see what is going on and judge the timing of the T-Bar. The lift operator will then place the T-Bar between each of your legs, a bit like a fishing hook in the mouth of a fish. Facing your T-Bar Buddy, you can then lean into each other for support if needed.
- Hot Tip: Pusha T(-Bar) - Use your back foot to perform a little push off as the T-Bar as it whisks you away!
There will be a little bit of slack before you start to move, so be prepared for a small jolt before you take off.
French Fries – Skier + skier combo:
With 2 sets of skis and poles, there is a lot going on down there. Ensure your skis are pointed up the mountain, if you look down, it should look like 4 straight french fries! Make sure your knees are bent to prepare for take-off, and your poles are held in your outside hand with the tips pointing up the mountain, so they don’t get caught on the ground. The T-Bar will be placed behind you just below your bottom. There will be a little bit of slack before you start to move, so be prepared for a small jolt before you take off.
The Odd Couple – Skier + boarder combo:
The snowboarder will usually be facing the skier, meaning the snowboarder’s side of the T-Bar takes preference. All you need to do is follow the same steps above based on your riding speciality.
Please know that it is normal to have a few goes at this step and it is not easy to get it right the first time round. Hopefully after reading this blog, it will increase your success rate.
If you are unsuccessful in mounting the T-Bar, it is highly important you move out of the way as quickly as possible for the safety of you and others. If you fall off but are still holding onto the T-Bar, let go of it as soon as possible to avoid injury. You can always rejoin the line and try again!
Step 4: Ride the T-Bar – Yeehaw!
If you have made it past the first three steps, congratulations, you should be making your way up the mountain as we speak! But don’t lose concentration, even the pros sometimes catch edges and fall off T-Bars. Everyone has their own unique strategy to help navigate themselves up the mountain. For some it might be looking down at their skis or looking up the mountain, or a combination of both. You can figure out what works best for you as you are experiencing your first T-Bar.
- Hot Tip: If you want expert advice for catching T-Bars, book a private lesson to guarantee your T-Bar buddy is patient, understanding, and an expert on all things T-Bar related. You also get to skip the line!
Remember to keep your knees bent, eyes on the path, and look out for skiers and boarder who may be traversing across the T-Bar.
Step 4: The dismount – Goodbye T-Bar buddy
This is sadly where you say goodbye to your T-Bar buddy. However, before you get to the end of your leisurely T-Bar ride, it is always good to communicate with your buddy which direction you want to ride off to.
- Hot Tip: This is a great way to break the ice early on in your T-Bar trip if you want to strike up a conversation!
If you are both going the same direction, ensure the person who is on the furthest side holds onto the T-Bar while the other person dismounts. If you are both going opposite directions, you can ask your buddy to hold onto the T-Bar while you dismount first
- Hot Tip: As a beginner, it is easier to get your buddy to hold onto the T-Bar while you dismount.
If you both want to go opposite ways, this will involve crossing over each other. It is best to come up with a compromise to avoid any collisions. This is why it is important to chat about dismount with plenty of time left on the T-Bar.
- Executing the dismount – First rider off: You want to gently slide the T-Bar away, whilst pointing your gear to the side so you can get out of the way for your T-Bar Buddy. If you are snowboarding, ensure you move to a safe place to strap back in. Same goes for skiers, don’t lollygag around the T-Bar after you have dismounted to make room for other riders.
- Executing the dismount – Second rider off: If you have been left with the task of looking after the T-Bar, there is nothing to stress about, and it is easier than it looks. Once your buddy has hoped off the T-Bar and is out of the way, just slide the T-Bar away from behind you and guide it towards the drop off zone.
Step 5: Celebration!
Congratulations on riding your first successful T-Bar. You should be extremely proud of yourself as the journey was a tremendous triumph. There were highs, and there were lows. But now that you have done it, you’re all set to ride them again and again!
Best places for beginners to learn to ride a T-Bar
We recommend giving Mitchell T-Bar at Front Valley a red hot go after you have done some warmup laps on the V8. If you have ventured off Front Valley, head over to Happy Valley T-Bar, it’s a super flat T-Bar with an easy dismount that will bring you up to Mid Station where you can reward yourself with a yummy hot chocolate!
If you want to familiarise yourself with the concept of riding uphill, Smiggin Holes has plenty of J-Bars. Whilst they are different, we recommend trying a J-Bar first if it is your very first time on the slopes before you tackle a T-Bar.
We can’t wait to see you ripping around Perisher on our trustee fleet of T-Bars!